Built-in and Custom Data Attributes

Enjoy these notes? Want to Slam Dunk JavaScript?
These are notes based on my Beginner JavaScript Video Course. It's a fun, exercise heavy approach to learning Modern JavaScript from scratch.
Use the code BEGINNERJS for an extra $10 off.
When you are working with HTML elements, those elements have something called attributes.
Attributes are anything provided to an element as additional information. Things like classes, src, alt are all attributes.
Attributes work the same way as the other properties that we have been working with, so we will go over it quickly before getting into custom and data attributes.
To add an alt attribute to the image element we were using in the previous video, you would add the following JavaScript code 👇
pic.alt = "cute pup";
TIP: When adding alt attributes to images, the value of the alt text should describe the image. You do not need to include in the text that it is a photo, because screen readers will specify that.
Although we did not add the alt attribute when we authored the element, when we added it via JavaScript, you can now see it on the element.

We can also set the width of the image this way, by adding the code below 👇
pic.width = 200;
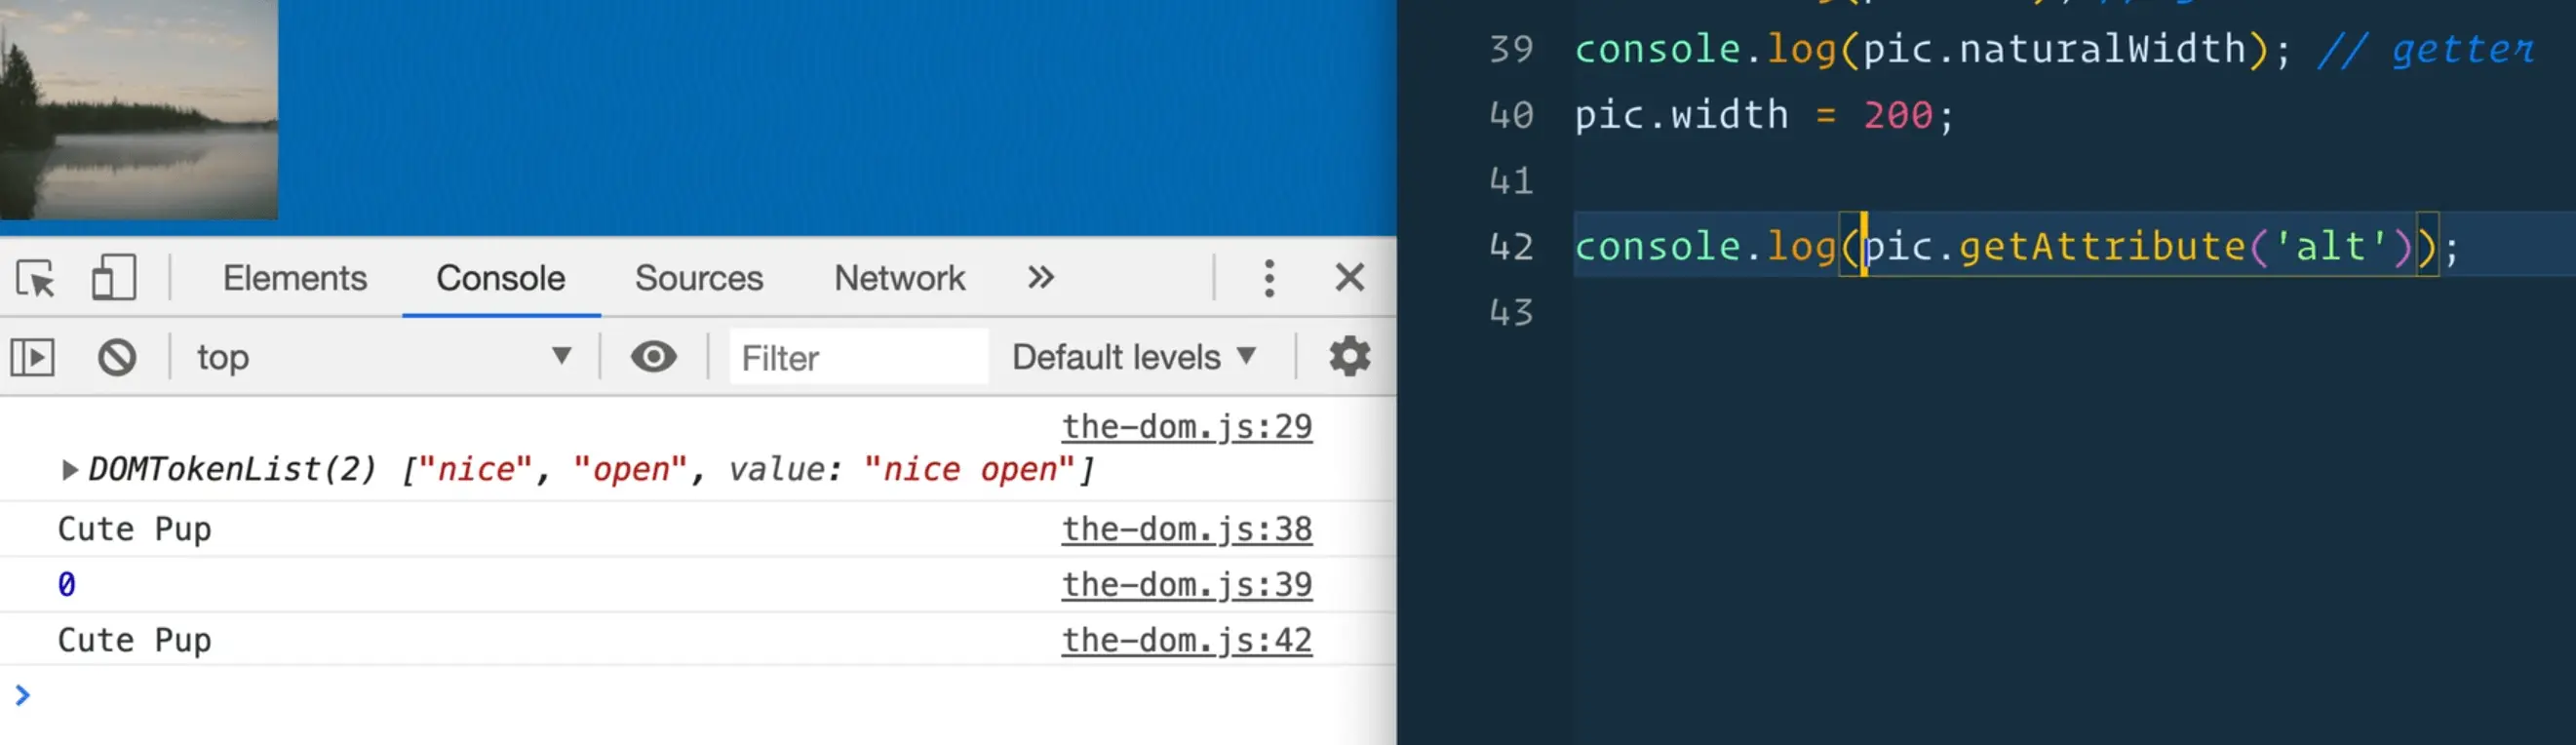
Most attributes are both getters and setters, meaning we can set the attribute, and retrieve the attribute value. That allows us to do both of the following 👇
pic.alt = 'Cute pup'; //setter
console.log(pic.alt); //getter
Some attributes however are only getters, such as naturalWidth.
If you add the code below, we get zero 👇
console.log(pic.naturalWidth);

However, if you copy and paste that in the console and run it, you get a value of 600 back.

Why is it zero when we log it from the JavaScript file, but running the code in the console returns 600?
This is a problem that you frequently run into, which is that we have to wait for the image to actually be downloaded for us to know how large it is.
This is a big problem when people were building slideshows.
How can you overcome this? One option is to add an event listener on the load event.
What that will do is wait for all the images, resources, CSS, JavaScript, and anything that needs to be loaded to load before calling the function.
window.addEventListener('load', function(){
  console.log(pic.naturalWidth);
});
When you refresh your HTML page now, after a split second, you should see the naturalwidth value logged in the console.
You can also use the event listener specifically on an image.
Modify the code we added like so 👇
pic.addEventListener('load', function(){
  console.log(pic.naturalWidth);
});
That still works, because once the image is loaded, the event listener will fire.
(All of that event listener stuff is a bit ahead of ourselves, we will be covering it later in the course, but it's good to know some of the gotchas that you may encounter.)
You might be asking yourself
"We added our JavaScript script src tag at the end of the html file, doesn't that mean that is waits for everything to be loaded?"
Yes, putting the script at the bottom of the HTML page waits for all the HTML to be loaded. However, if the HTML goes ahead and makes additional requests like downloading images, it doesn't wait for those.
Getting back on track, we were discussing how naturalWidth is only a getter.
pic.naturalWidth = 200;
If you try to set it with the code above 👆, it won't error out, but it won't do anthing.That is because it is an attribute that you cannot change.
All attributes on an element are done via getters and setters.
You can use the dot notation to access them.
You may have run into these methods already:
getAttributesetAttributehasAttribute
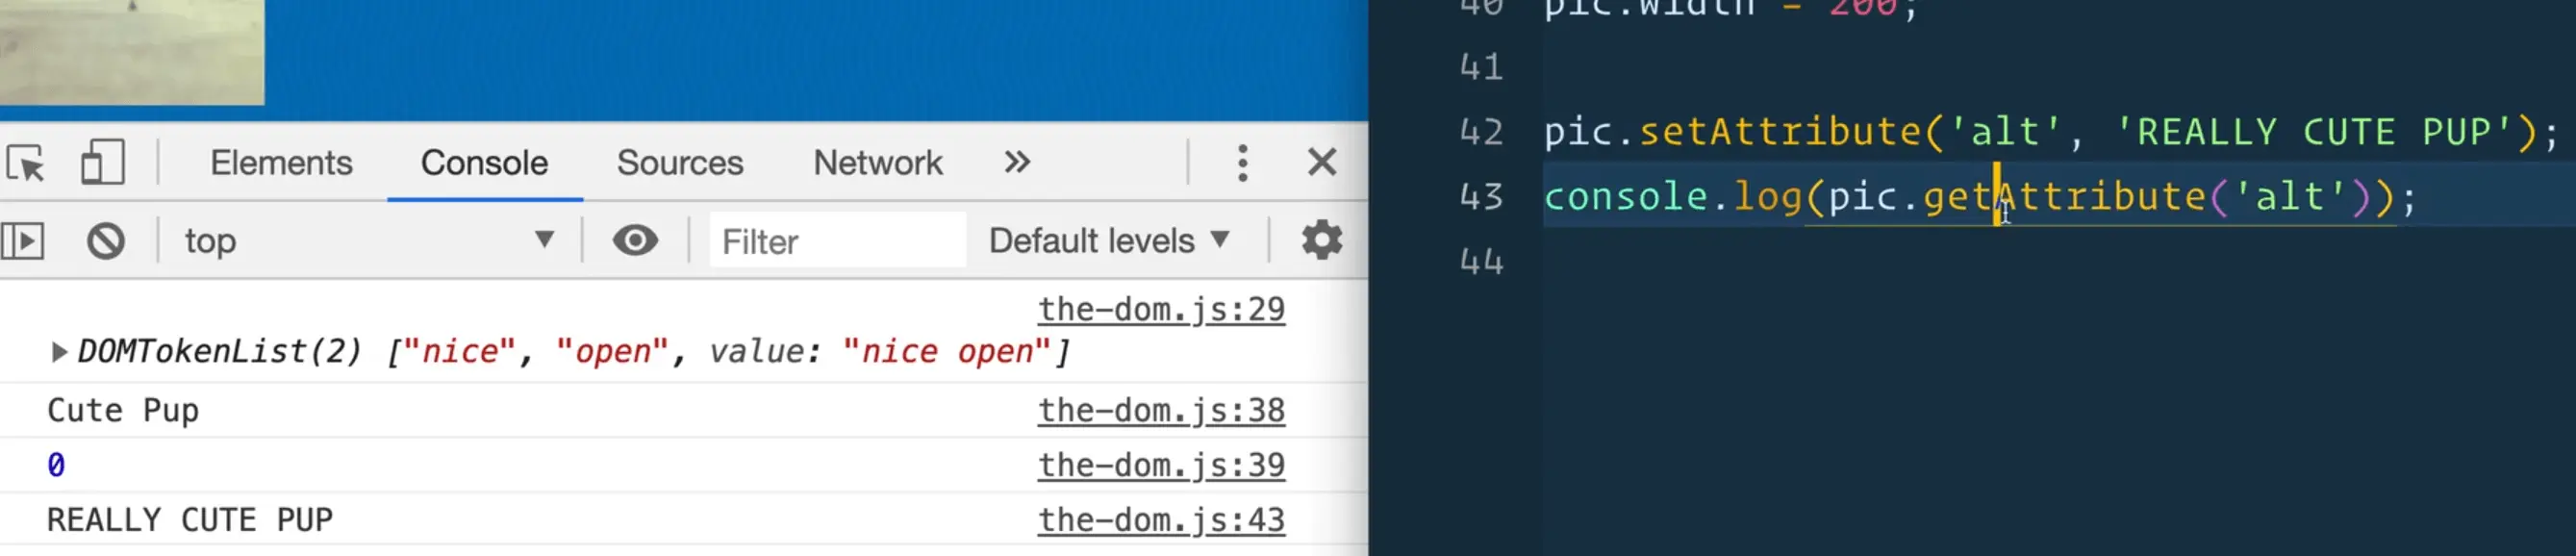
You can use getAttribute like so 👇
console.log(pic.getAttribute('alt'));
You can use setAttribute like so 👇
pic.setAttribute('alt', 'REALLY CUTE PUP');
And there is hasAttribute which will return true or false based on whether that attribute is set on an element or not.
console.log(pic.hasAttribute('alt'));
What is the difference between using getAttribute and using the dot notation to grab the attribute?
The difference is that setAttribute() will also work for things that are non-standard.
We have HTML as a spec, and you have all of your standard attributes in the spec like alt, title, width, src, and all of those things.
But if you want to set an attribute that is non standard (which you shouldn't do, more to come regarding that), you can use setAttribute to make something.
For example, 👇
pic.setAttribute('wes-is-cool', 'REALLY CUTE PUP');

You should not go making your own attributes whenever you want because it is possible that in the future, an HTML standard attribute will be introduced with the same name as one of your custom attributes.
Then you would end up with a situation where you have legacy code that is clashing with the standards which will lead to bugs.
Data Attributes
If you do want your own custom attributes, you want to use data attributes.
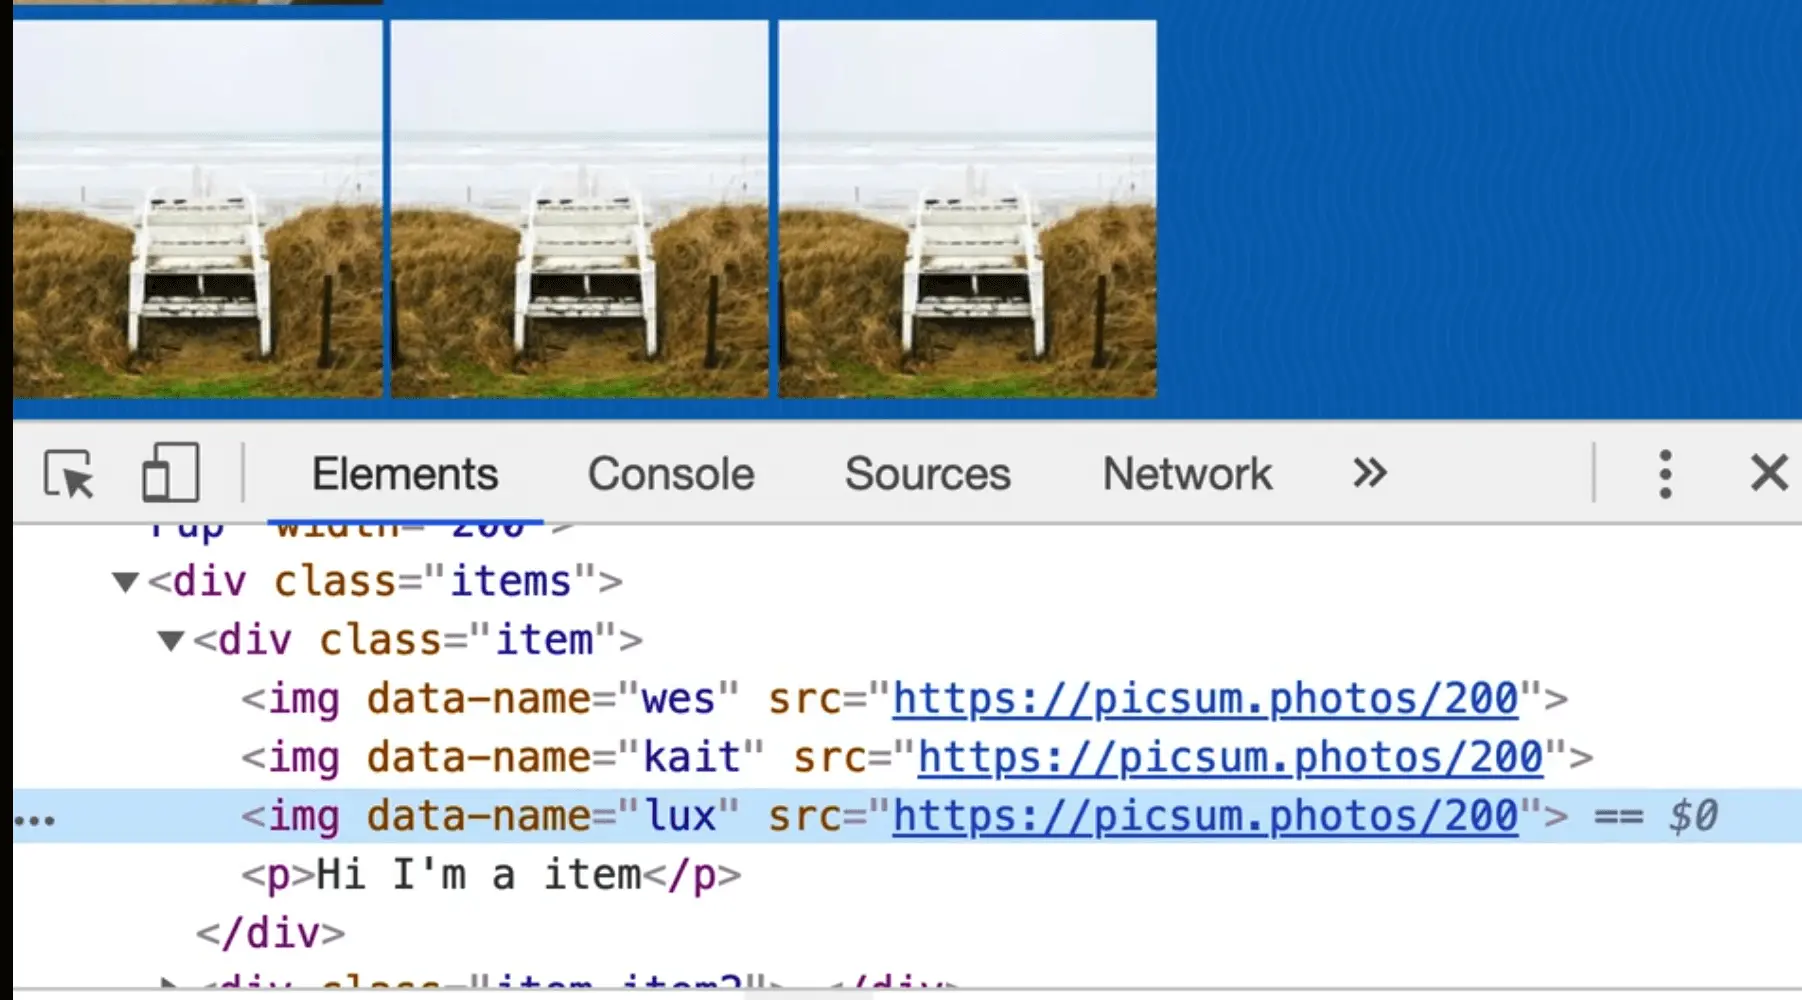
To demonstrate what data attributes are, we will do an example.
In the HTML page, duplicate an image tag 3 times and add a data-name attribute to each, like so 👇
<img class="custom" data-name="wes" src="https://picsum.photos/200" />
<img data-name="kait" src="https://picsum.photos/200" />
<img data-name="lux" src="https://picsum.photos/200" />
In this example, we wanted to attach a piece of metadata to each of the images.
If you want to attach metadata or something to an element that does not have any sort of standard attribute like a name attribute, then you can use data- anything.
For example: data-dog, data-name, data-description are all valid data attributes.
That will allow you to attach metadata to an element.
Let's say we wanted to grab the image with the class of custom and access the data attributes on that image.
You might mistakenly think we do something like this 👇
const custom = document.querySelector('.custom');
console.log(custom.data);
However, that will not work, and will return undefined.
If you want to access the data attributes on the element you would call dataset like so 👇
const custom = document.querySelector('.custom');
console.log(custom.dataset);

That gives us an object that is full of all the property values that you have.
data-name shows up as the name property in our object, and if we had multiple data attributes on the same image, as shown in the code below, they would both be present in the object. 👇
<img class="custom" data-name="wes" data-last="bos" src="https://picsum.photos/200" />

Why would this be useful?
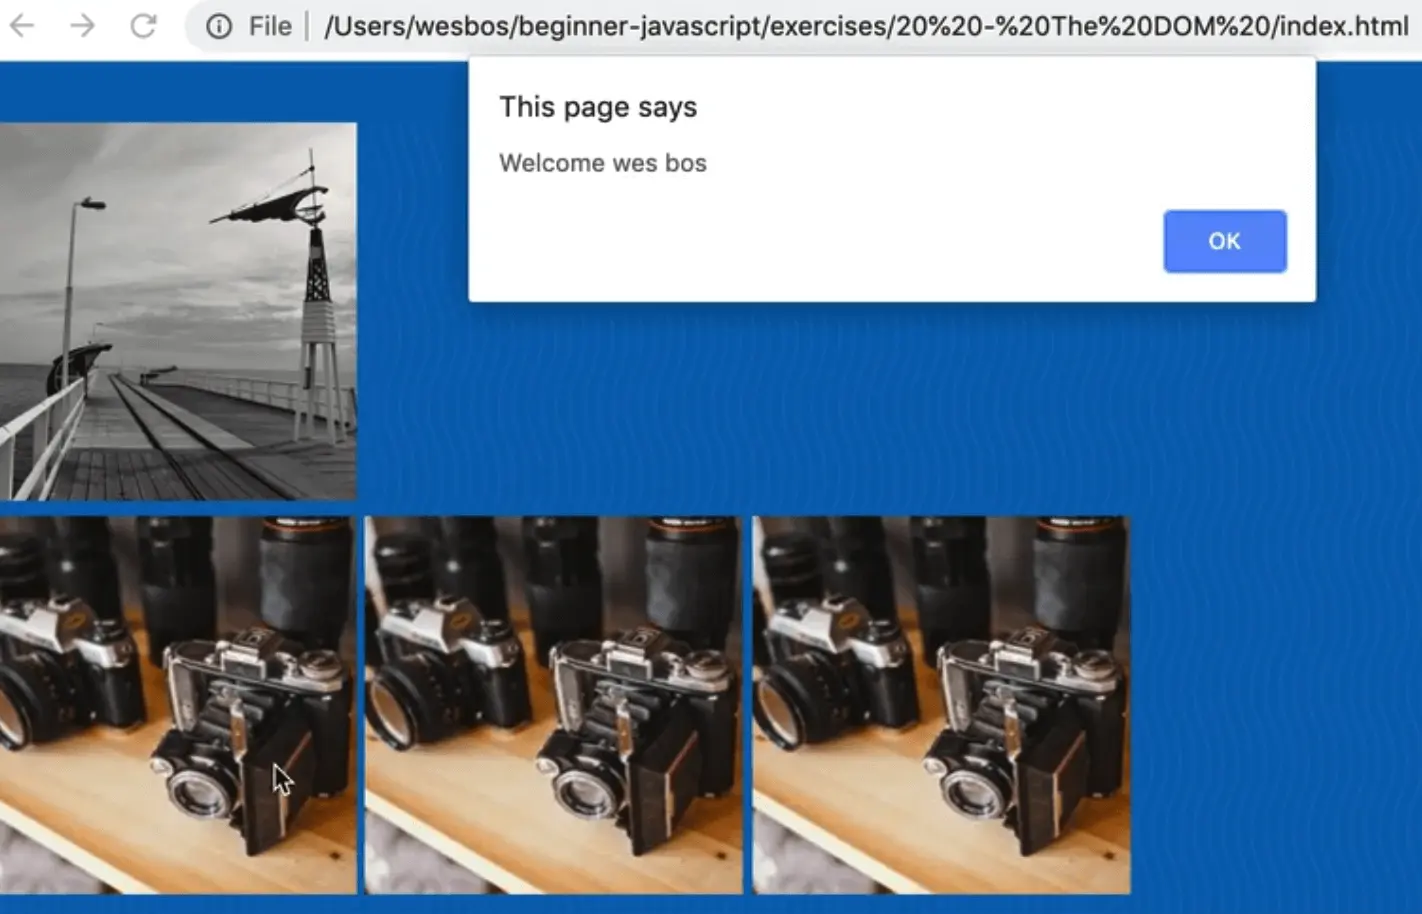
This is useful because we can do things like listen for a click on an element, and when someone clicks on it, we can alert them.
Take the following code for example 👇
custom.addEventListener('click', function(){
  alert(`Welcome ${custom.dataset.name} ${custom.dataset.last} `);
});
If you add that, and then click on the image, you would get an alert, similar to the one shown below.
Wes loves using data attributes when coding vanilla JavaScript.
To recap: anytime you need a custom attribute, such as when you need to associate some sort of information with an element, use the custom data attribute.
Find an issue with this post? Think you could clarify, update or add something?
All my posts are available to edit on Github. Any fix, little or small, is appreciated!
 Forgot to take pics before it was gobbled. Also made Treatza and cinnamon buns
  Annual pizza pics imminent
  What’s Canada like?
  AFK
AFK 